


Let’s be honest, piñatas are the undisputed kings of the cheap party thrill. Whether you are aiming for a rocket ship, a goofy elephant, or a seasonal pumpkin, building your own is surprisingly straightforward. It beats buying one that arrives in a box, and it usually survives the beating longer than the store-bought stuff.
Here is the breakdown on how to make a pinata that actually holds up.
Gather Your Supplies
You don’t need a workshop. Just a few standard household items and some patience.
Tools:
– Scissors
– Measuring cup
– Bowls (one big enough to hold your balloon)
– Mixing spoon
– Saucepan
– Serrated knife
– Artist’s brushes
– Ice pick (for the final break)
Materials:
– Large and small balloons
– Newspaper
– Flour
– Water
– Cardboard tubes (toilet paper or paper towel rolls)
– Transparent or masking tape
– White glue (optional, for extra strength)
– Poster paint, colored tissue paper, construction paper, yarn, or pipe cleaners for decoration
– Sturdy string
– Hard candy and small toys for the fill
Time Commitment:
Plan for 2 to 4 hours of active work. Then, wait. You need 2 to 3 days for the layers to dry completely. Do not rush this. A wet pinata is a soggy, sad mess.
Start with the Shape
Grab a large balloon. This is your core structure. If you want a round shape—a fruit, a head, a ball—use a standard round balloon. For elongated things like planes or ships, use a long balloon.
Make sure it’s big enough. A diameter of about 12 inches is usually enough to hold candy for a whole party. If you are making a head, use a smaller 6 1/2-inch balloon. Buy an extra balloon for each size just in case it pops on you. It happens.
Make the Paste
Forget the store-bought glue. The classic method uses flour and water. It’s cheaper and smells less like chemicals.
- Mix 1/4 cup of flour with 1 cup of cold water in a bowl. Get all the lumps out.
- Boil 5 cups of water in a saucepan.
- Take a spoonful of that boiling water and stir it into your flour mixture. This tempers it so the flour doesn’t clump when it hits the hot pot.
- Slowly pour the flour mixture into the boiling water while stirring constantly.
- Lower the heat and simmer for 2 to 3 minutes.
- Let it cool. All the way down to room temp.
Build the Base
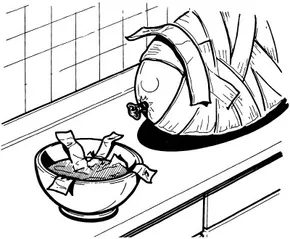
Blow up your main balloon. Tie it off tight. If you have a big bowl, set the balloon inside it to catch the inevitable drips.
Arms and Legs:
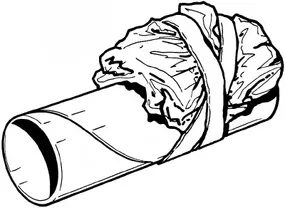
Take your cardboard tubes. Cut them to length. Tape them to the balloon body using transparent or masking tape. Make sure they are anchored firmly. If they wiggle, the papier-mâché will crack later.
Heads:
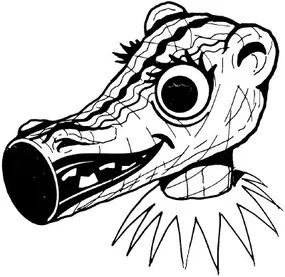
If you need a head, blow up the 6 1/2-inch balloon. Set it in a separate bowl so you can work on it independently. For animals with long necks or open mouths (like a horse), you can use a flattened toilet paper tube as the base for the head structure instead of a balloon. Tape a tube to the body for a neck if needed.
Apply the Papier-Mâché
This is the meditative part. Soak a newspaper strip in the cooled paste. It needs to be thoroughly wet. Squeeze out the excess with your fingers, but don’t dry it out.
Lay it on the balloon. Smooth it down. Crisscross the strips around the balloon, overlapping by about an inch. You need at least two thicknesses of paper for the body. Leave the tied neck of the balloon uncovered for now—you’ll deal with that later.
If you have limbs, cover the cardboard tubes with strips that run the full length of the tube and overlap onto the main balloon body. Build them up to the shape you want. If the ends of the strips start to lift, add more paste and smooth them down.
Do the same for the head balloon if you are using one. Two layers. Overlapping. Smooth.
For the Animal Head:
If you are using a flattened toilet paper tube for an animal head, crumple some newspaper strips and soak them in paste. Attach them to the top of the flattened tube with long, uncrumpled strips. Build up the volume. Leave one end of the tube open for the mouth. Once the shape is right, dip your fingers in the paste and give the whole head a light coating, smoothing the strips as you go.
Let it sit. Let it dry. The real work happens while you’re waiting for the moisture to leave the paper.

Final drying and assembly
Patience is the one ingredient you shouldn’t rush into here. Let the papier mache body and head harden until bone-dry. It’s not just about the dryness of the surface; The structure must be stiff and brittle enough to maintain its shape without bending. If you want the piñata to not fall apart as soon as someone swings it, let it rest for several hours before applying another, twice as thick, layer of strips soaked in paste. Carefully brush these strips over the balloons and fill in any gaps. Gradually stir in more paste. Then go away. Let it dry for 2-3 days. Real drying. No surface dry. You want the paper mache to rattle when you shake it.
Connect the pieces
Once the material has completely hardened, it’s time to assemble the monster. Pop the balloons inside the hardened shells. Pull the remaining rubber out of the open ends. If your design has an distinct neck, you’re all set. If not, you need to bridge the gap between the head and the body.
Grab a sharp, serrated knife. Carefully cut a small hole about 2 inches in diameter into the piñata body. This is where the head will attach. Cut a matching hole at the base of the head. Don’t glue them together yet. Leave the holes open. You need that access point to fill the piñata with candy, toys, or confetti. If you have already added neck structure, this step is irrelevant, but on most traditional designs this 2″ opening is non-negotiable.
The Makeover
Now the fun part. Paint it. Use poster paints. Or choose the classic route and cover the entire surface with colored tissue paper in layers. Add construction paper ears. Glue on the wings. If you like, use crepe paper for streamers or pipe cleaners for whiskers, tails or hair. The sky’s the limit, but keep it structural. Do not add so much weight that the papier-mâché cracks.
If the piñata has an open mouth, paint the inside black. It adds depth. Makes it look hungry. If the face is closed, paint a smile. Or a big grin. Something that suggests chaos. Let the paint dry completely. No sticky spots. Then fill it up.

The real work begins before you add the candy. You need to make a few small holes on both sides of the top edge of the pinata. An ice pick is the most effective, but it must be done carefully. Crushing the papier-mâché destroys its structure. Thread a long, strong rope through the hole. This rope can withstand weight.
Now fill the cavity. If the head is empty, fill it in as well. Use hard candy or small packaged toys. Small plastic figures are very useful. They don’t crush as easily as sweets. Glue the head back to the body. Use white glue. Apply liberally to ensure a strong bond. Fix it tightly. Allow to dry completely. Don’t rush. If the glue is wet, the pinata will fall apart.
Hang it at a party. All you need is a tree branch or a sturdy rafter. Keep it low enough for children to reach. It’s not that high so you need a ladder. Take turns. Blindfold one child. Give them a light club or stick. Spin them around three times to disorient them. Send them toward the target.
Only one child can actually break a piñata. The rest just watch. When it finally snaps open, everyone gets the prizes. It’s a fair system.
Do puzzles and find more DIY ideas
If you want to keep your child busy with their hands, try making puzzles. It’s a different skill, but just as valuable. The next page has instructions for creating custom puzzles.
For parents looking for alternative ways to engage with their children, we have other helpful guides. It is important to understand which toys are developmental and which can be harmful. Find detailed advice on choosing the right toys for your child’s development.
Clothes do not necessarily need to be changed if they are damaged. You can make your child’s wardrobe more durable by learning to repair clothes. Save money and learn useful skills.
If you prefer tech, electronic toys are everywhere. Consumer Guide offers reviews of these educational electronics options. You know what is worth investing in and which are just noise.


